

First Steps
What to do Once Initial Setup Has Been Completed.
Step 1: Testing Basic Functionality
Movement and Homing
Before anything else, ensure the machine can move smoothly and freely. Manually move the gantry slowly by hand from one end of the machine to the other. Position it in the center of the machine, then repeat this process with the left tool, then the right tool. Position the left tool in the middle of the left side of the machine, the right tool in the middle of the right.
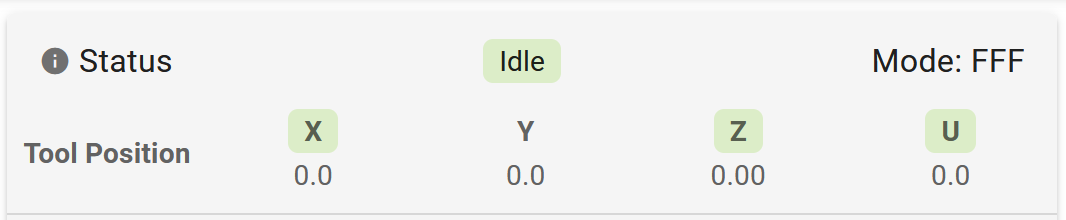
To ensure the limit switches are functional, manually actuate each one and check that it reports being triggered in the web interface. There are two for the Y axis, and both should display a triggered state independently. In the example below, the X and U switches are triggered. The Z switch is also triggered, though this is normal when the probe is not deployed.
Remove the probe from the dock and attach it to the probe arm. Check that the Z switch is no longer triggered, and that the Z-Probe status is reported as 0. Trigger the probe switch by hand and check that the probe status is 1000 and the Z switch is triggered. Return the probe to the dock.

With the gantry and toolheads in position from the first part, home the X axis only. When this succeeds, home the U axis and then the Y axis. Once all three have homed successfully, test homing the Z axis. Ensure the probe is deployed successfully, triggers correctly, and docks successfully.
If there is an issue with deploying or docking, the probe dock offset macro may need to be run. The macro is located in the "Macros" tab, under "Calibration>Probe Calibration".
Heaters and Fans
Next Steps
Now that the machine is configured and tested, it may be useful access the web interface from device on your local network. We highly recommend running through some basic calibration before starting a print due to shifting that may have occurred during shipping. These calibrations should only take 10-20 minutes and include leveling the bed and calibrating the tool offsets. From there, loading filament and obtaining the PrusaSlicer profiles may be useful.
Last updated