

Bed Leveling and Mesh Compensation
How to use the Macros on HSP1-I to Automatically Level the Print Bed and Compensate for Bed Distortion
True Bed Leveling
After shipping, or if the machine is moved, the Z axis may have settled and physically skewed. The best way to account for this skew is to tram the Z axis. This can be accomplished via the "True Bed Leveling" feature. This should be done while the bed is cold since the idea is to tram the Z axis, not to compensate for print bed distortion.
The True Bed Leveling command can be accessed through the web interface via the "Dashboard" tab.
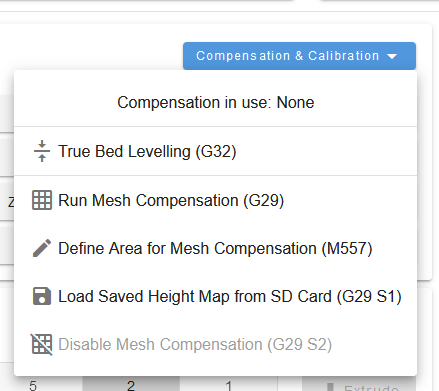
Under the "Compensation & Calibration" dropdown, select "True Bed Leveling (G32)". The machine will then home, if it hasn't already, deploy the probe, and probe the four corners of the buildplate. It will repeat the probing process until the adjustment values converge to less than 20 microns difference.
Mesh Bed Compensation
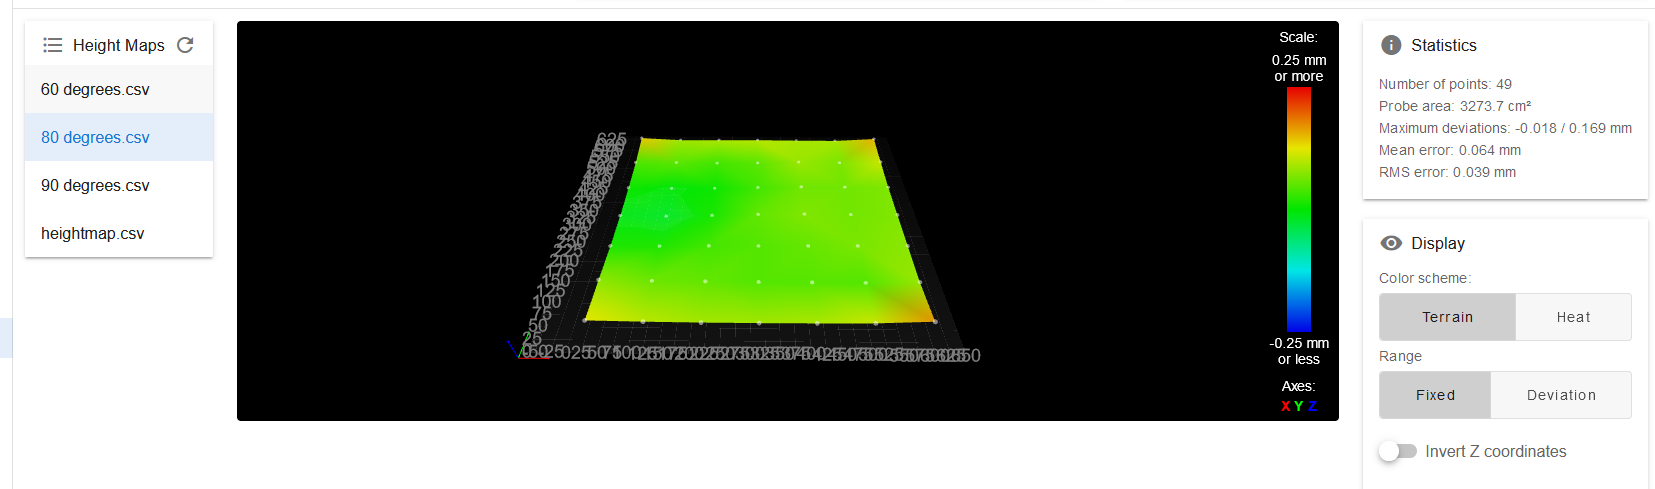
Once the Z axis is trammed, the next step is to compensate for print bed distortion caused by thermal expansion when the build plate is heated. We recommend running this routine after setting the bed heater to the printing temperature dictated by the material and allowing it to reach a steady state, at least a half an hour after reaching the set point. This should be done for each unique temperature set point. HSP1-I automatically saves unique height maps in 10 degree ranges.
The Mesh Bed Compensation can be found under the "Compensation & Calibration" dropdown in the "Dashboard" tab, just like True Bed Leveling. Selecting the "Run Mesh Compensation (G29)" command will home the machine, if it hasn't already, deploy the probe, and probe the whole buildplate in a grid. The subsequent height map can be viewed in the "Height Map" tab.
Last updated